Technical Bulletin
5R55 Transmission - Vent Tube Replacement
Replacement of the vent tube assembly on the 5R55 S, W, or N units
Issue:
The external vent assembly must be removed from the original transmission and installed on the new, remanufactured transmission.
Procedure:
- Remove the vent assembly from the original transmission.
- Use caution when removing the front, middle, and rear fittings from the transmission. Note: some models only have the front and rear fittings.
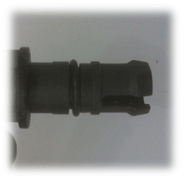
- The front is easily removed by gently squeezing the inner tabs slightly. You can see these by looking in at the top of the bell housing. These tabs are designed to lock in place, so do not attempt to remove the fitting without squeezing the tabs. (Fig. 1)
- The middle fitting, if present, is simply a tapered, press fit. Using a pair of locking pliers, twist the fitting back and forth as you pull it out.
- The rear fitting has tabs, but is not a locking design. (Fig. 2) Pull it out by hand, being careful not to bend it to the side. A twisting motion will help to ease the removal process.
- Install the tube assembly in the remanufactured transmission in the reverse order.
- Insert the rear fitting in to the case. If necessary, lubricate the fitting with a small amount of clean transmission fluid.
- Gently tap the middle fitting down to secure in the case. A small amount of thread locker can be used if necessary.
- Insert the front fitting into the bell area.
- If a replacement assembly is needed, then you can use the following part numbers to help getting the correct assembly from the dealer.
- For 5R55S and 5R55W units: OEM# 6L2Z-7034-CA
- For 5R55N units: OEM# 4W4Z-7034-AB
 |
|
 |
| Figure 1 |
|
Figure 2 |

